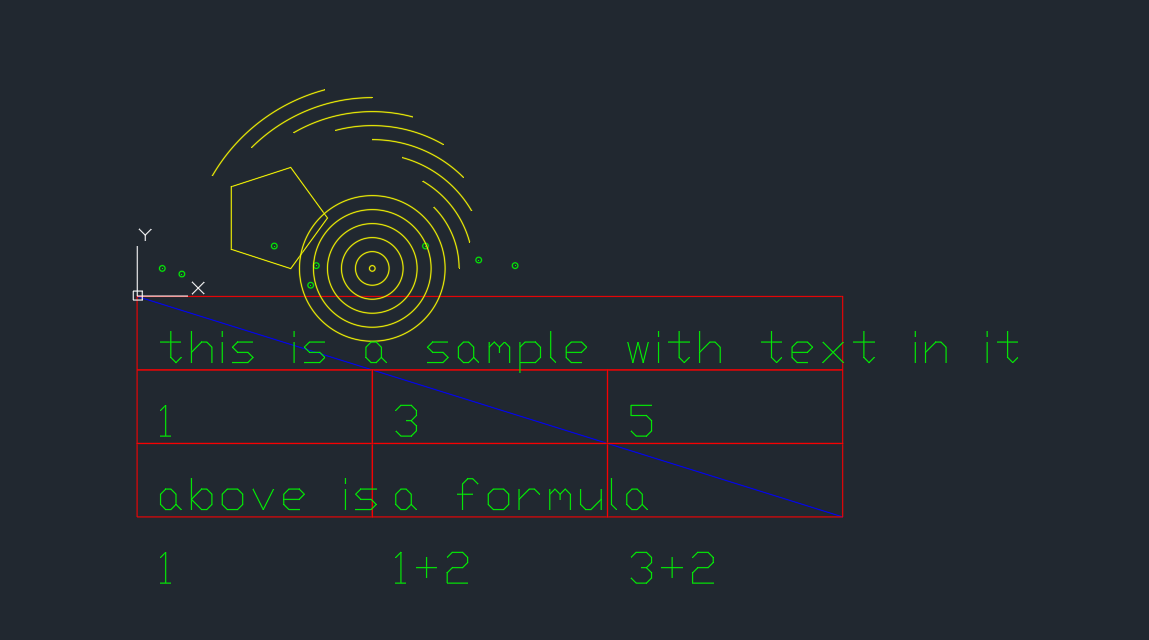
How to convert Excel Cell Formula Tables into AutoCAD DXF Tables
How to Create CAD DXF Files From Excel Tables
Excel is amazing at being a spreadsheet program, but it really doesn’t play well with other higher-end applications. CAD is a great example of this.
Most CAD applications are cumbersome to work and do not offer a great interface for integration with Excel. Which is why we sought to fix this problem.
Excel Draw
Excel Draw is a Microsoft Excel add-in that takes the functionality of Excel and plops a CAD style graphing engine inside of it. While Excel Draw offers lots of different functionalities, like creating objects from functions and formulas, or automation with VBA, the main function we are going to be focusing on in this post is the ability to convert cell contents into formatted tables with color.
If you would like to learn more about Excel Draw, check it out here.

Cells to CAD Style Tables

To create a table from your Excel spreadsheet, all you need is Excel Draw.
Download and installed Excel Draw. Afterward, simply run the add-in from the shortcut on your desktop.
Inside of your worksheet, create a mock-up table using cells, mergings, font colors, and cell boarders.
Excel Draw can take colors of fonts, font sizes and cell boarders to created DXF drawings that you can export into any CAD program or CNC machine.
With you have your table created, select the cells you would like to create into a DXF and click (from the Excel ribbon) Excel Draw> Objects> Cells to CAD.
In the new Window, select the following options:
• Include Text Colors (will assign ACI values for current text RGB values)
• Scale Rectangles with Font (will make sure cells match font size in CAD as best as possible)
• Use Cell Font Size (use the font size you specified in the Excel cell)
• Disable Graphing in Excel (this will disable Excel Draw’s graphing engine – not need for this project)
• Export to DXF (this will automatically export the drawing as soon as it is made)

Once those settings are selected, click ‘Create’ and a new sheet will be made with your data converted to DXF file objects.
A new window will appear asking you where to save your DXF file.
In this window select your Export Folder, Name, and select ‘Force Text Color’ to include your font colors you previously selected. If this option is not selected, the fonts will have the default CAD coloring.
When ready, click ‘Export’ and ‘Yes’ to open your newly created CAD DXF drawing!


Want to see how they look? Here are links to the original files.
Drawing Preview-DXF – Excel Sample
Overview
There might have been a few steps in creating this document, but Excel Draw has many features that make it very customizable!
If you would like to check out Excel Draw for yourself, there is a free trial available at the following link. We also have training videos available too, if you are really interested in using Excel Draw to its full potential!


